


Professional Photographer and Instructor Ron Gilfillan Explains the Guidelines for Good Composition
BY RILEY CHERVINSKI, COMMUNICATIONS AND EVENTS COORDINATOR, OCEAN PROGRAM OF CPAWS MANITOBA
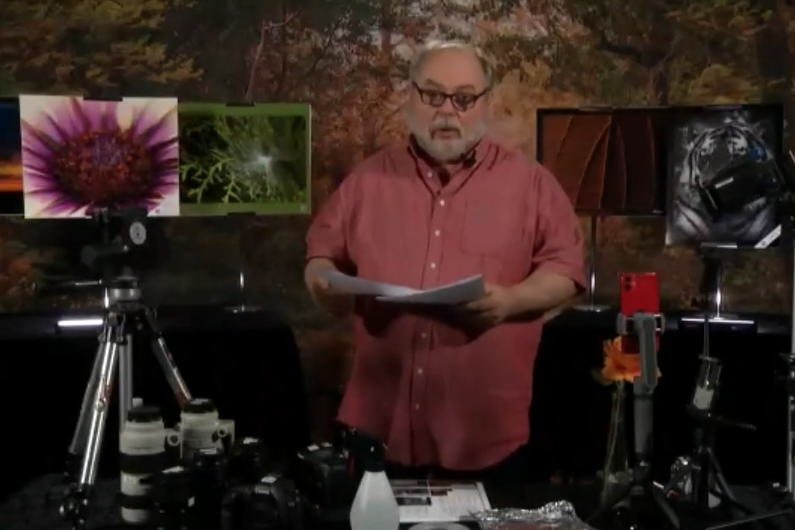
Grab your DSLRs, iPhones and film cameras — Ron Gilfillan, head photography instructor at Tec-Voc High School, has some helpful composition tips for photographers of all levels.
Whether you’re a cell phone user or a pro with a DSLR and a lighting kit, Gilfillan demonstrated how to create better images in a February 2021 CPAWS Manitoba webinar, attended live by almost 150 people.
As both a professional photographer and instructor of Tec-Voc’s professional photography program, Gilfillan has years of experience in the industry and behind the lens. The CPAWS webinar focused on nature photography, but these composition guidelines can be applied to any images you want to capture.
Note: The following images were captured by Tec-Voc photography students.
5 Basic Guidelines for Good Composition
“Composition is the placement of elements within the frame of a photo,” explained Gilfillan. “There are two main parts. First is the subject (the primary), which is what we take a photo of. The second is the treatment, which is how the subject is arranged within the frame.”
Here are five guidelines Gilfillan recommends for photographers to follow.
1. Rule of Thirds
- The frame can be divided into three equal parts, both vertically and horizontally.
- The subject should be placed on or near one of these four intersecting points.
- You may have more than one rule of thirds in a photograph.
- The main feature or subject is often in an off-centre placement.
- The horizon line is either high or low but not centred in the frame.
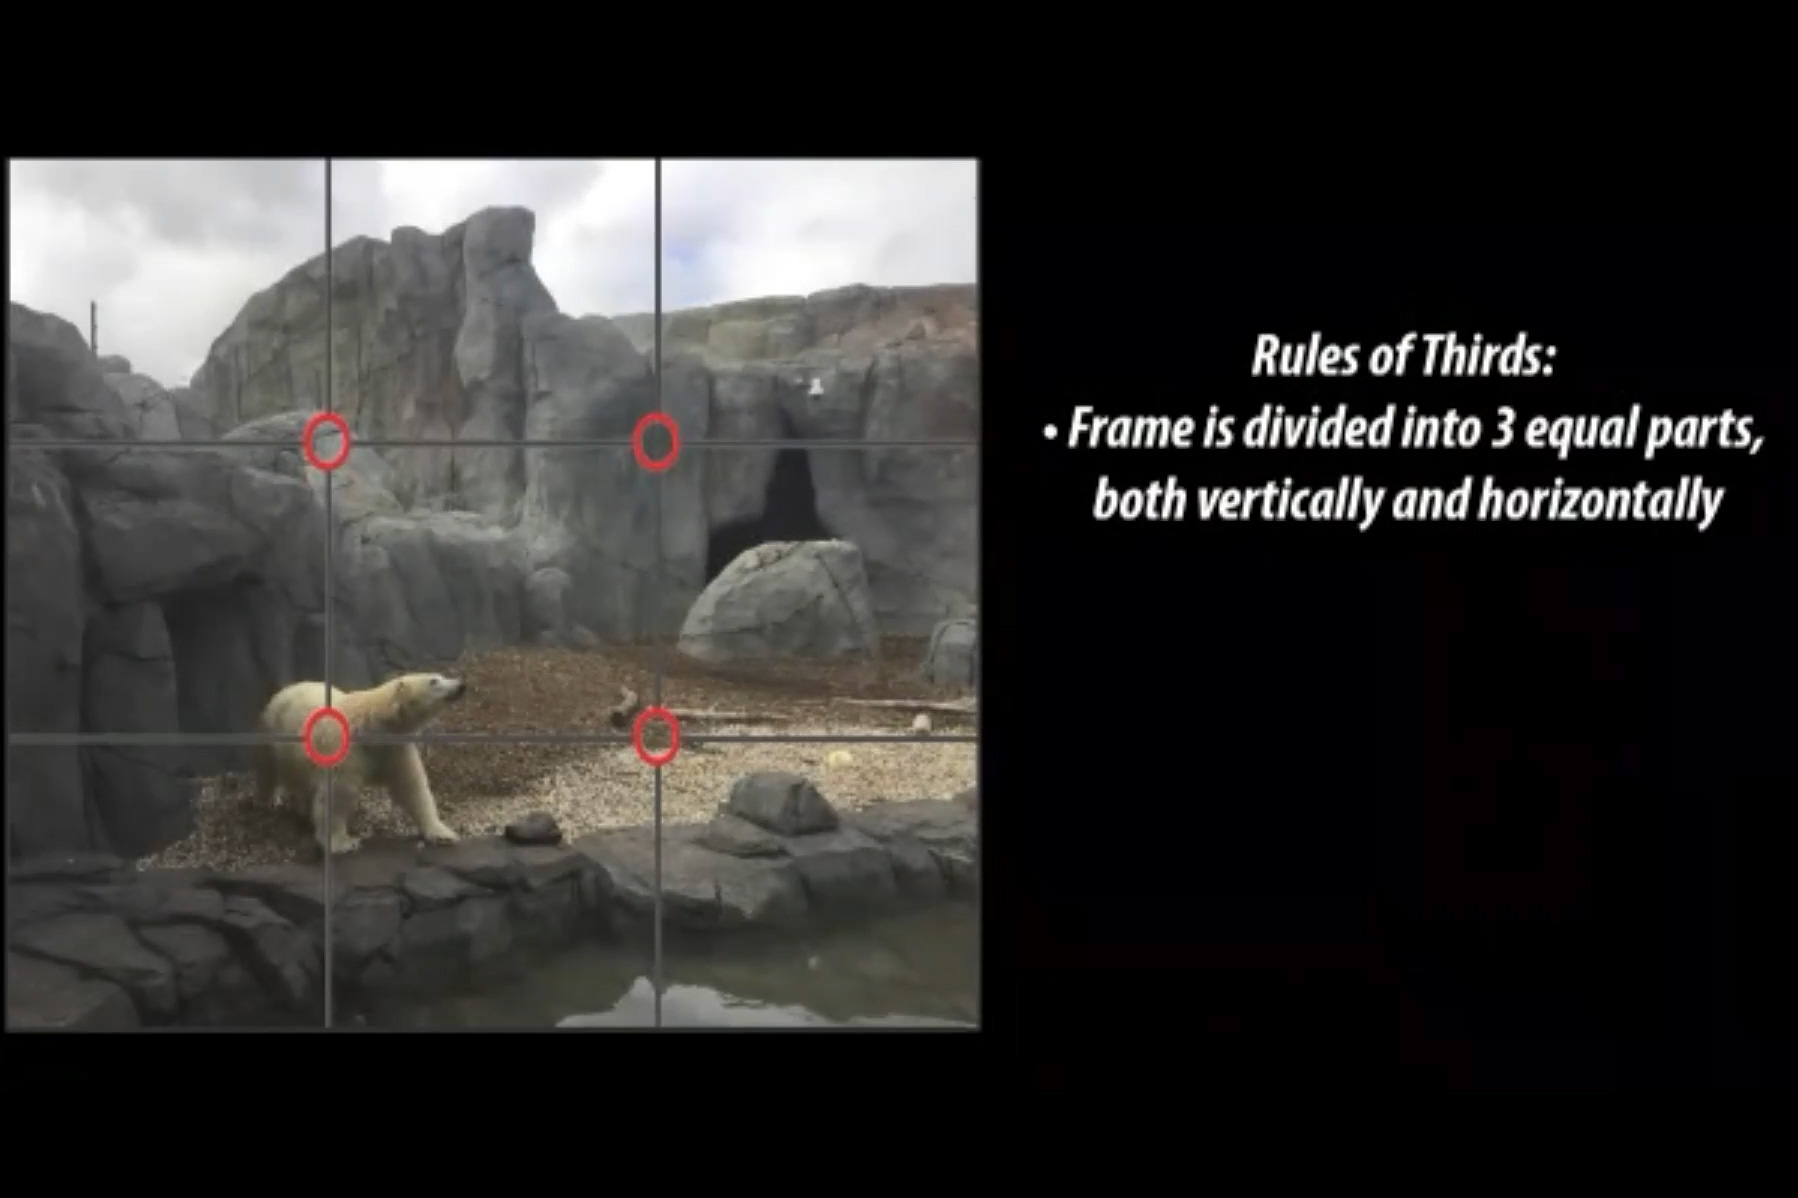
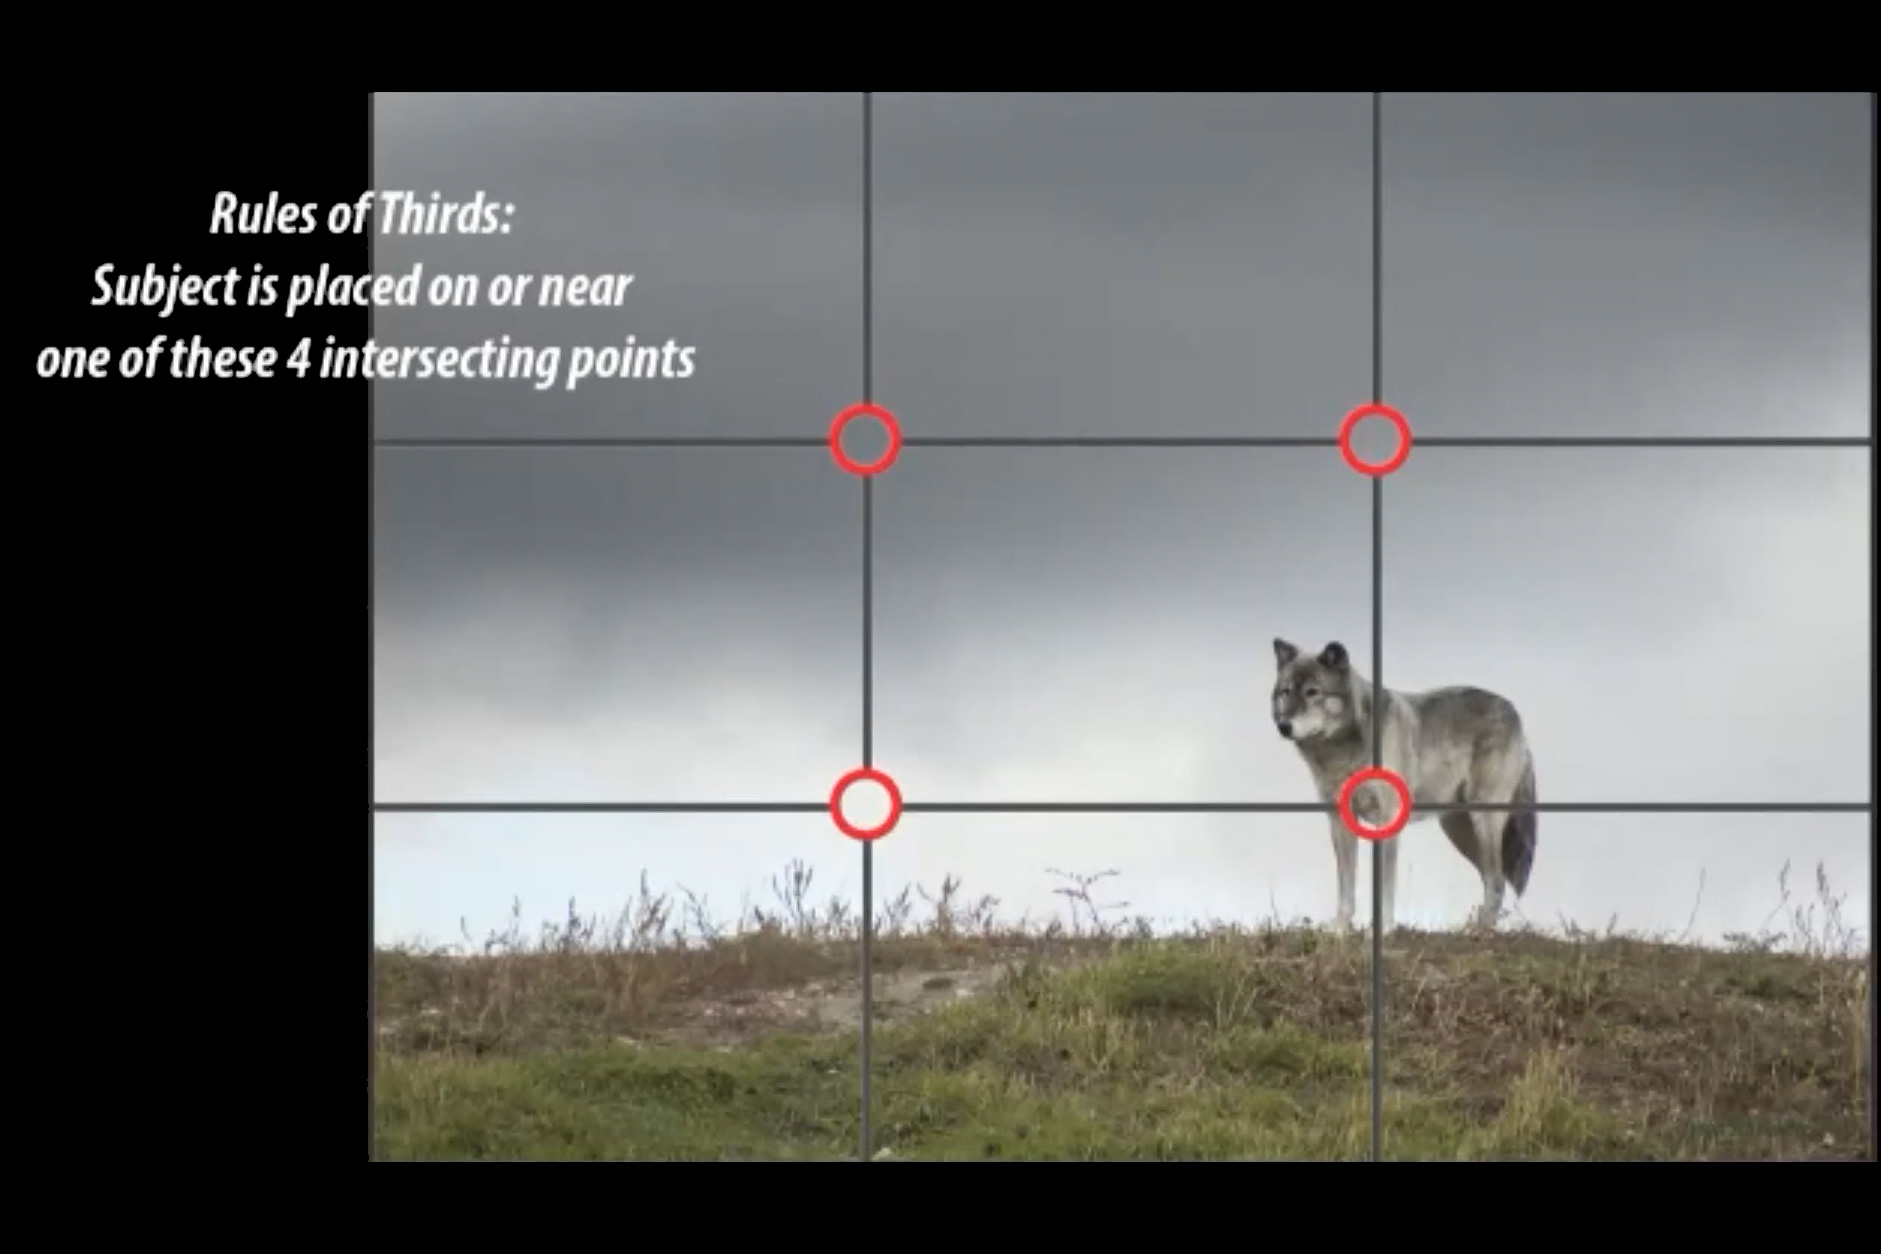
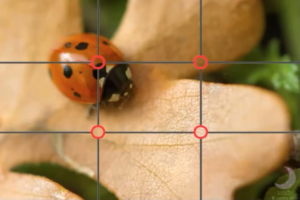
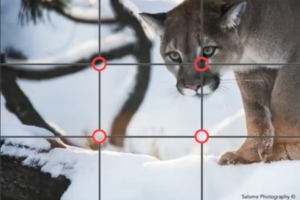


“In the first photo, the polar bears are moving from left to right. The polar bear is moving across and we have our rule of thirds with three equal parts, both vertical and horizontal,” said Gilfillan. “In the second photo, the subject (the wolf) is placed on or near one of these four intersecting points. The horizon line should always be on one of those lines or lower. The ladybug in the third photo is at the top and is moving from the top left corner down towards the bottom right,” he explained.
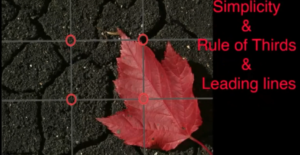
2. Leading Lines
- Creates movement through the photograph; in, out, around.
- Can draw the eye to the centre of interest.
- Can be repetitive for strong impact.
- Like the “S” curve, it is a great shape and very graceful.
- Can be fences, roads, train tracks, rivers, diminishing objects, etc.


“Leading lines create movement within a photograph. A leading line should bring you to the subject. We don’t want the leading line to take you in and then take you out of the photograph, we want it to be held within the image,” explained Gilfillan.
The first photo is a good use of selective focus — the background is out of focus, the pine needle is in focus, and it’s sharp.
“If you’re capturing landscapes like the English Garden in Assiniboine Park in the second photo, they’ve been designed by folks that have been taught the same principles we’ve been taught — S and C curves, leading lines and how to place colour. The only thing that’s lacking in this image is if we had a little child or a husband and wife at the end of this path. It would be very easy to take this location and place a bride and groom at the end,” said Gilfillan.
“A leading line always starts in the corner of the image. In this third photo, it is coming in from the top and brings us down to the water droplet. The maker of this image has left enough room for the water droplet to drip down, giving the image motion and texture,” he explained.
3. Simplicity
- Is close up.
- Has uncomplicated backgrounds.
- Avoids unrelated subject areas.
- Uses off-centre placement.


4. Balance
- Can refer to colours and tones (a large dark area balanced by a smaller light area, for example).
- May be similar-sized shapes or objects.
- Is symmetrical or asymmetrical.
- Can have lines repeated from top to bottom to left to right.
- This can be the hardest to make work in a pleasing way in the photograph.


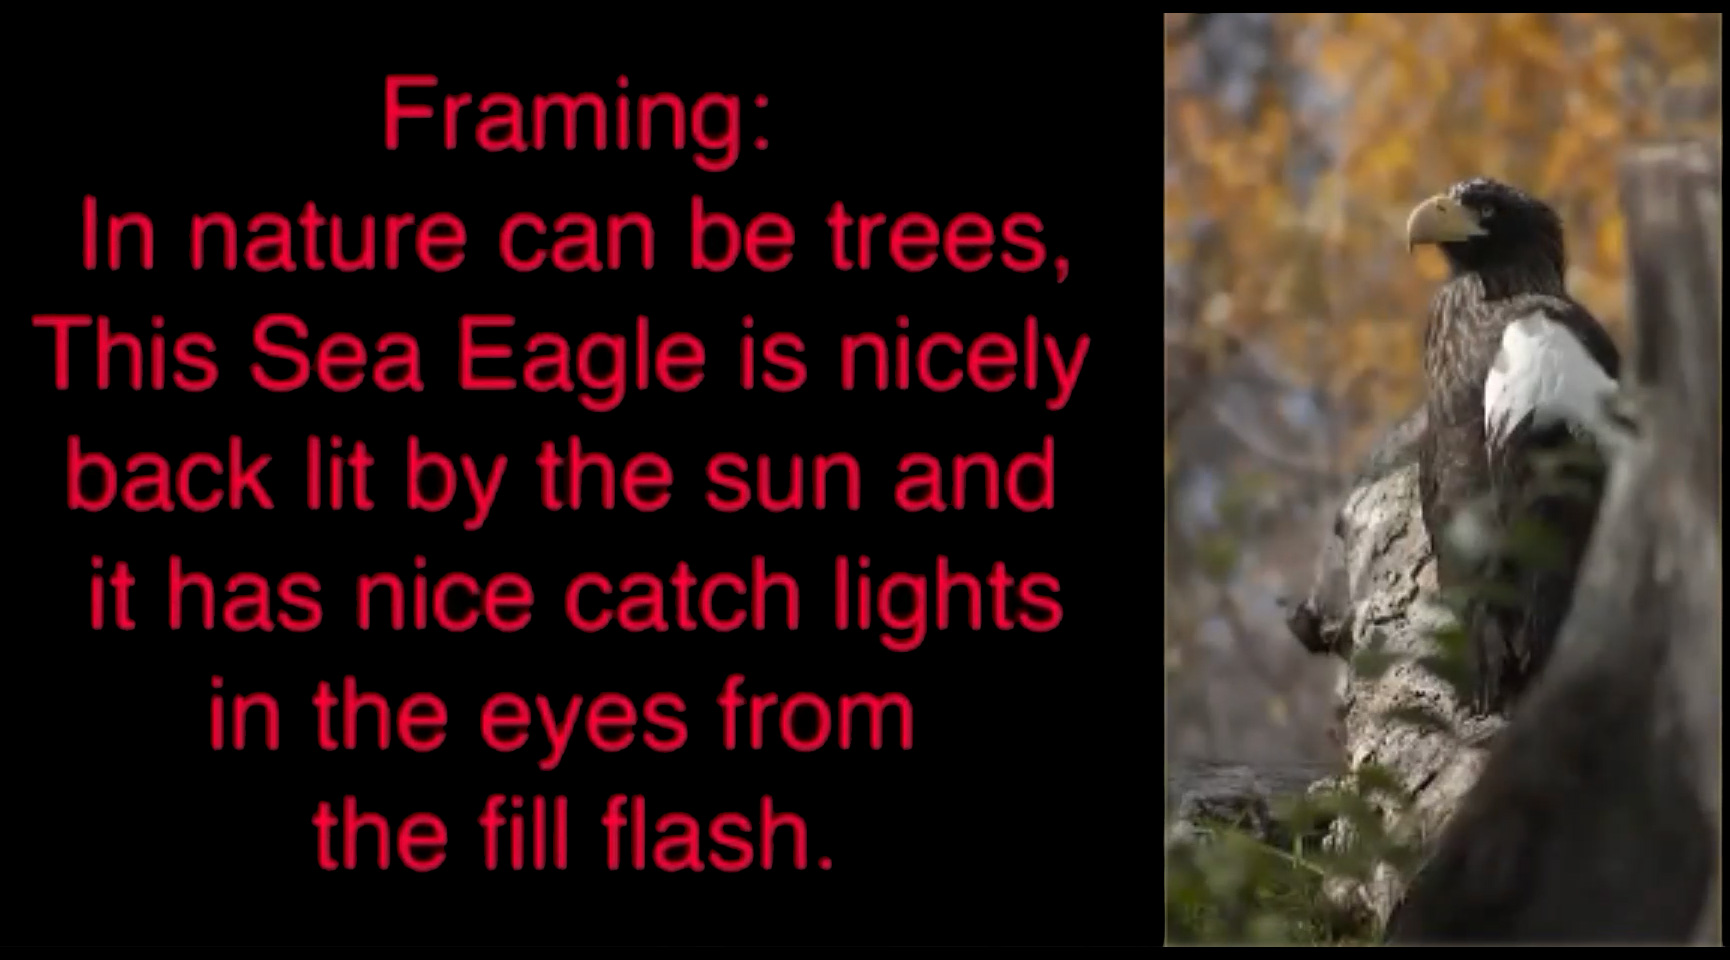
5. Framing
- Encloses the main subject by a shape or form.
- In nature this can be trees, branches or clouds, for example.
- Can be something manufactured, like a building, window, doorway and so on.
- Provides depth to the photograph with a strong foreground, middle ground and background.
- Will often have strong geometric shapes that will also lead and enclose the subject.

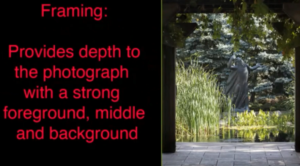
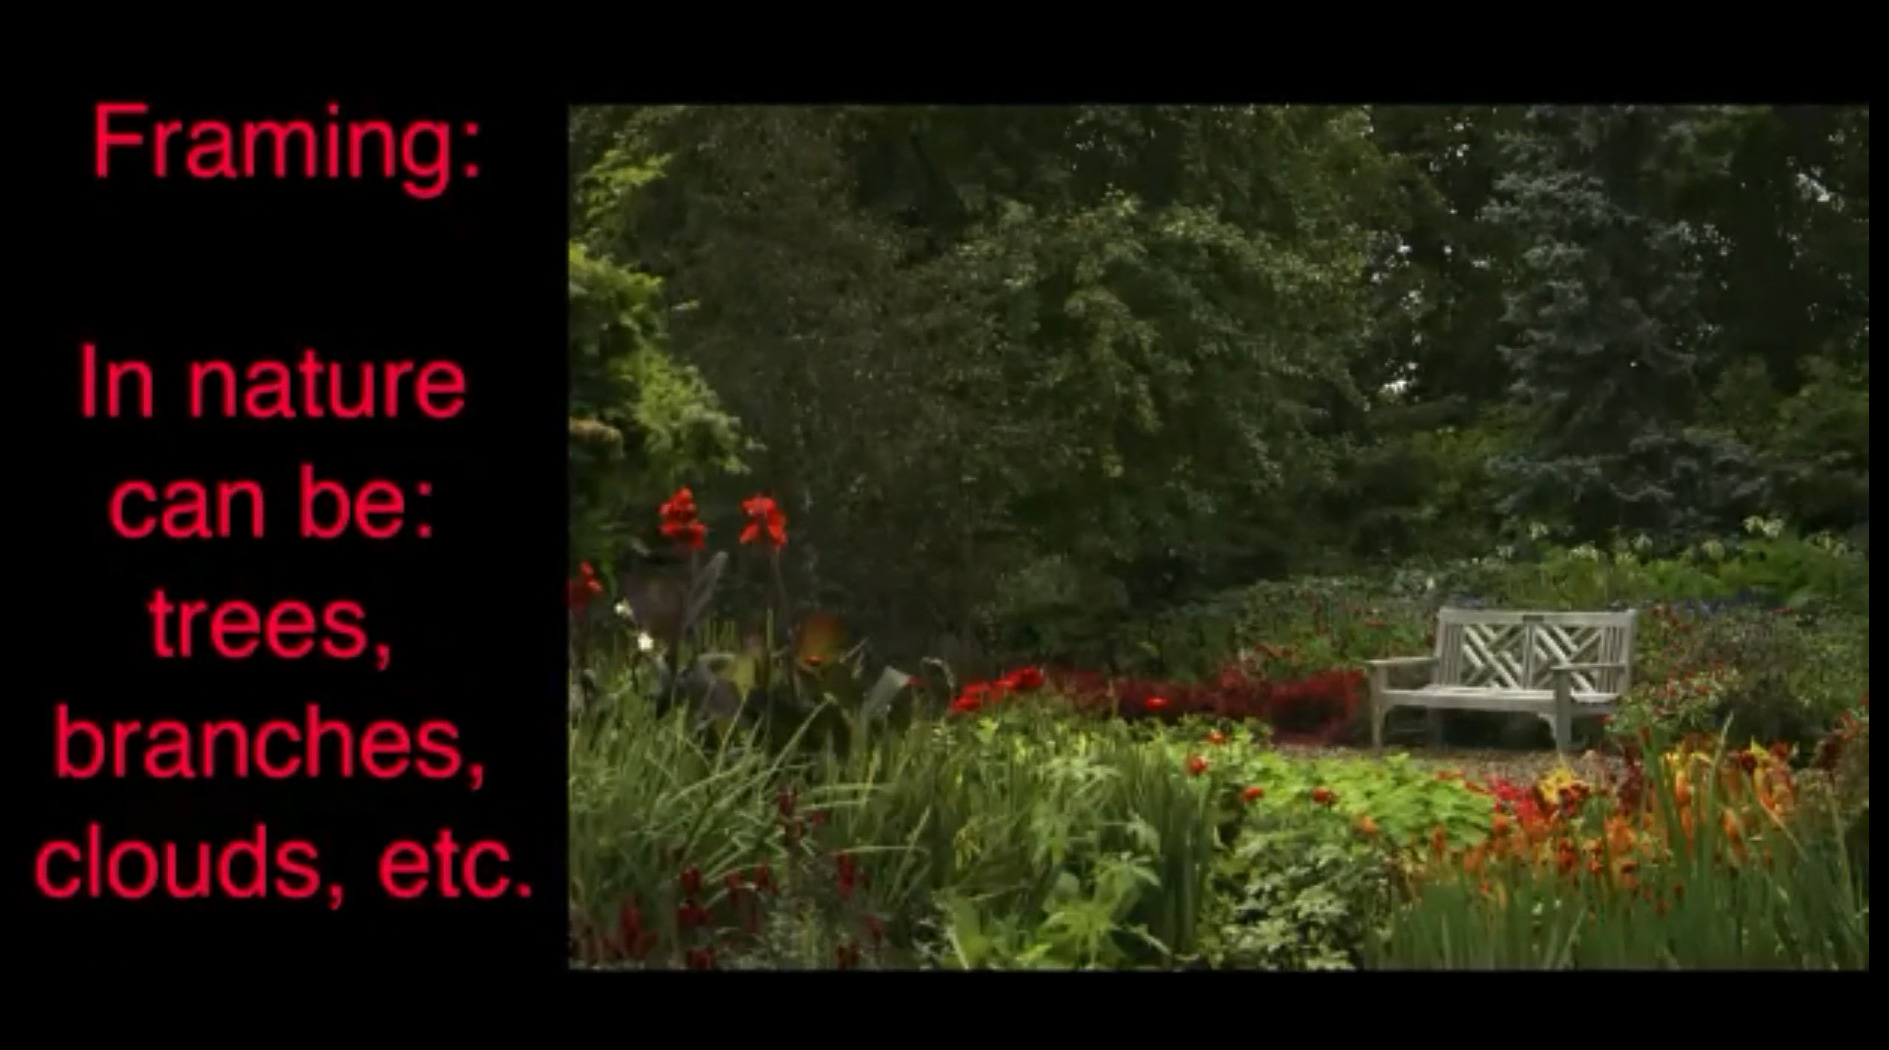


“You always want the frame to be in the forefront. That’s when the frame is going to be the strongest,” explained Gilfillan.
“At the Leo Mol Sculpture Garden in Assiniboine Park, the building is a frame to frame the statue. The background is monochromatic (mostly the same colours), so it doesn’t really make the statue jump out. But we have a foreground, we have a middle ground, and we have a background, so we have lots of depth. There are quite a few benches in the English Garden that landscapers have set up. They’re nicely framed for photographs,” he said.
To Avoid: Mergers and Bull’s-eyes
A merger is an object placed in an unnatural position in the photograph (ex. a tree branch growing out of someoneʼs head, or one giraffe growing out of the other)


“Bull’s-eye means placing your subject smack dab in the centre,” explained Gilfillan. “When we used film cameras, there used to be a focusing zone dead centre of the frame. A lot of people would use that round circle to place their subject because that’s how the camera focused. With cameras now, you can set up focusing zones and choose what you want to be in focus,” he said.
This webinar was part of our Lunch and Learn series to encourage Manitobans to safely spend time outdoors, appreciating the beauty of our wild spaces and exploring nature in our own backyards.
This program is possible thanks to the generous support of Safe at Home, The Winnipeg Foundation and the Conservation Trust, a Manitoba Climate and Green Plan Initiative delivered by the Manitoba Habitat Heritage Corporation.